Here is a brief work-in-progress video that breaks down my main VFX shots. The finished film will be exhibited and screened alongside third year projects at the AD19 festival on November 6th.
Category: Capstone Project
Audience Shots & Finalising (Capstone Week 12/12 Update)
This week I focused on the rotoscoping and matte painting work for my audience shots. I’ll move forward with Sound Design in the remaining few days of this academic year.
A quick overview (refer to attached video):
- I came across a lot of colour banding in my Matte Paintings, especially visible in my spot light / vignette sequences. YouTube somehow made this look much worse and extremely pixelated- I am not too sure how to go about it besides enabling Maximum Bit Depth and setting this to 32-bit. Both options still don’t seem to give very promising results, but I will keep researching for a fix. (might just be YouTube’s low codec, so I’ll aim to make it look better at least on my mp4 render.)
- Like I discussed in my previous entry, I used a bit of royalty-free audience stock footage to blend my shots with.
- I used nCloth to simulate the curtains, a screencap of the stage as reference in Maya and rendered this with Redshift.
- My rotoscoping work in After Effects was unintentionally maximised because I made my limited crowd sit in one row (silly me), which wasn’t at all ideal. Thanks to the extension though I decided to just get it over with and managed to finish ahead of time.
- Most of the shots aren’t as clean as they need to be, but I figured since they were going to have a darker CC anyway and still managed to convey boredom / indifference regardless, I left them as they were.
- I had some issues rotoscoping at first because I shot my footage in 4K for when I zoom into my crowd to show their reactions better. The lag was unbearable, so I decided to just work with them in 1080. I rendered some of the rotoscoped 4K clips as transparent PNGs to reuse though so it wasn’t a complete waste of time.
- I have one more shot in progress for the climax scene where the crowd visibly leaves the stage, but shouldn’t take me more than a day to complete.
- I have finalised the order and pacing of my final edit, and still have the audio clips from when I made my animatic to re-use and polish up. At this stage I will just be touching up on the quality of my overall film for submission.
We gettin’ there folks.
Final Head Composites (Capstone Week 11/12 Update)
Picking up from where I left off with my tracked sequences last week, I finished compositing all my Head renders and can finally focus on my audience shots.
Breakdown
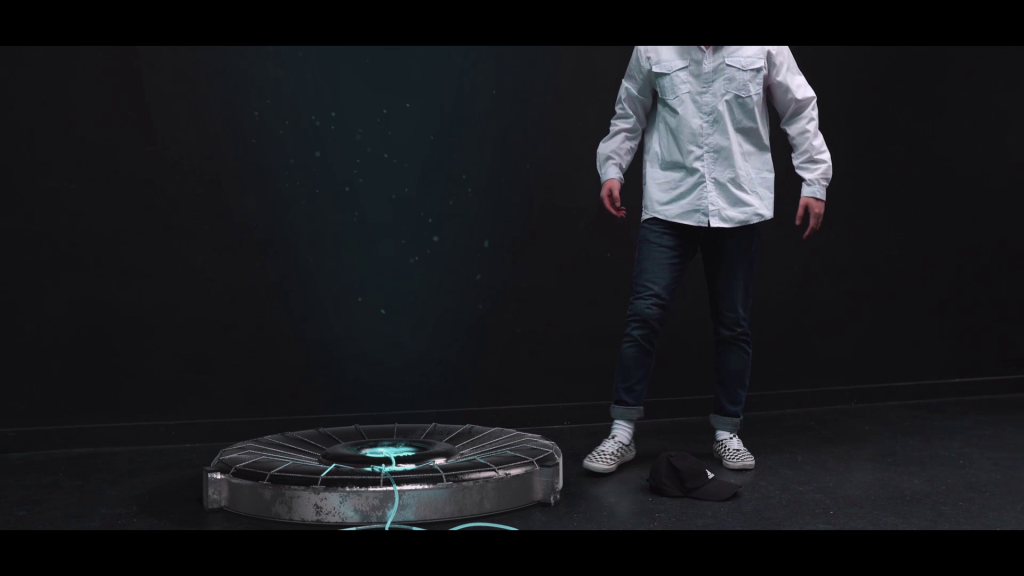
I will start off with a shot that still needs a little polishing; the holo device looks a bit too sharp for the scene at the moment and jittery up close, so I might go back to re-render it and add camera blurs in AE for a much better result.

In my FX tests last week, only one end of the laser beams were moving around to follow the trails of the fingers, while the opposite end was fixed in certain points on the wireframe. I thought it would look a little more interesting if this is going all over the place, encircling the space as if to foreshadow the Head, which would also help reinforce the fact that the actor is creating something from scratch, making a more impactful introduction to the character.
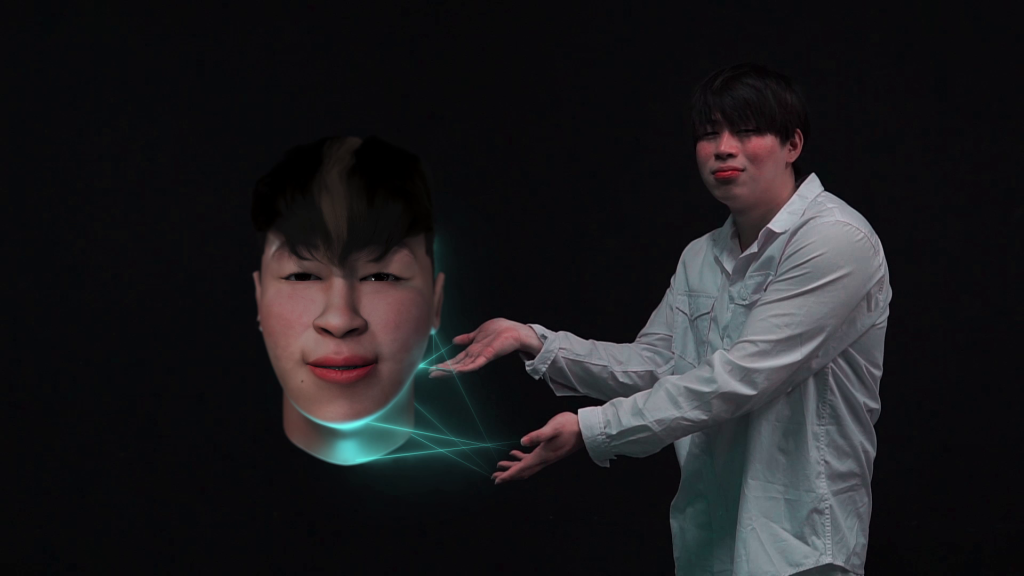
I added a zoom-in on After Effects to lay further emphasis on the subject of the shot- I found that it flowed better into the next shot this way. To make the zoom feel more organic, I made sure that my key frames were set to ‘easy ease’ instead of linear, and also re-created a shallow depth of field via Lens blur effect.

This is the sole reason why compositing took so long; I had to manually mask the trails of a few of my actor’s fingers (keying them a couple of frames at a time) to attach the laser beam onto. If I find the time I might go back and add light scatters on the hair in this shot using layers and different blending modes via AE to polish up.
To reduce render time on Redshift (and potential jitters) I decided not to integrate depth of field on the Maya camera and instead re-created the blurs on After Effects for a much cleaner shot. I masked out the area I wanted to be in focus and feathered this for the above result. Same principle is applied to the rest of my close-ups.

I also began colour correcting my shots and readjusting the highlights/shadows on my raw renders. This proved helpful in seamlessly blending my CGI with the live action footage.

The laser beams proved to be a nice touch to the wireframe transitioning into a different persona. Since I do not have a background for this shot I left it as a dark grey solid, which I might end up changing into a gradient fill so that it doesn’t look too empty.

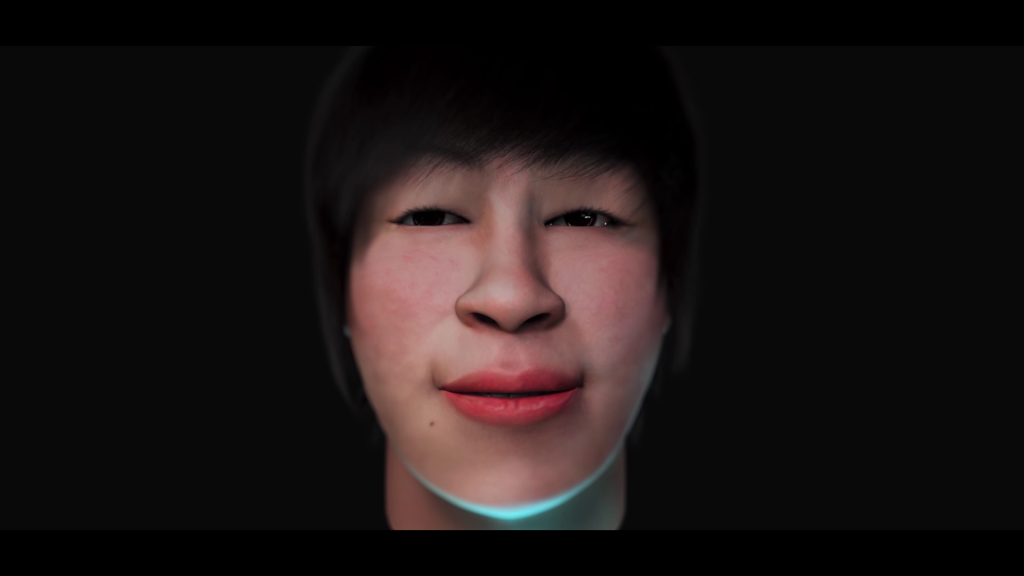
I wanted to convey my actor’s frustration in this sequence as much as possible because at this point in the film, three of his crafted personas would have all been rejected by the audience.
Although his body language may suffice, I wanted to further emphasise the fact that he is growing impatient. In this case, the Head glitches out via some strobes revealing the wireframe underneath, and some apparent flickering on the laser beams. It is a bit less obvious, but the Head could also be seen mouthing the words, “What in the world?”. It is then followed by a close-up of my actor as well as the Head going “No, no, no!”. All this would further reinforce his internal conflict.

Going back to the “No!” sequence, I had made a silly mistake with regards to the composition of my shots. When we did the performance capture, I directed my actor (acting as the Head) to turn to his right when facing his real self. I forgot about this when I filmed my live action stuff months later, where I mindlessly placed my actor on the opposite side. I didn’t realise this up until I had already finished polishing my facial animations.
To address this issue:
- Reshoots are a hassle, and therefore out of the question
- Simply rotating the Head control to the left would look unnatural due to the fact that the rest of the animations were leaning to the right
- Flipping all my key frames (for each eye, brow and mouth control) to compensate for this would take way too much time and effort
Having said this, I came up with a very unorthodox solution: I flipped my lighting in the scene (and for good measure, also moved his mole and piercing, because flipping the whole texture would mean I have to fix the UV mapping again which I did not want to touch), then I flipped the render again on After Effects to make it look like it was turning to face the left, and the results were just as promising.

In this shot I wanted to do the reverse of when the Head first appeared, hence it is disintegrating. I added a subtle Wave Warp to make it look like my actor’s hand goes through the head before he snaps it off.
Rough Composites (Capstone Week 10/12 Update)
This week I worked on making my Head FX shots more seamless, and continued to composite laser beams onto my actor’s fingers. I have broken these tasks down in the video above.

For its own sake I re-rendered this head sequence and changed the duration of the simulation so that it synced perfectly with my wireframe.

I decided to go without the disintegration effect in this particular shot because the Toon outlines / wireframe already made an overall cleaner transition into the next persona. There was also no need for a dynamic linear wire because I wanted to make the hair look like it’s relatively gelled up and stationary, not to mention the lack of head movements.
After much reflection and task listing, I figured it would be more efficient if I had just sacrificed compositing time for my audience shots and probably revert to using stock footage, just because they aren’t really the main focus of my narrative. I thought it would be better if I kept prioritising these for more visual impact.

With that said I am nonetheless open for improvements. I recorded these in the green screen room a couple of weeks ago in case I have some time to spare to be able to use them as audience silhouettes for my establishing shots.


Overall next week I am confident of finishing up all of my effects (apart from audience) to showcase.
Further Compositing (Capstone Week 9.2/12 Update)
This week I finished off all my Head renders for compositing and began to apply two of my main VFX. Below is an overview of the techniques I used in the above video.

With Sim (Test) 
Without Sim
Reverse Disintegration
Existing tests of this has been done last semester, specifically outlined in this entry. I called it the ‘Metamorphosis’ or reappearing effect.
I used After Effects to animate multiple spot-like shape layers that transition from black to white as shown above. The black part, when imported as an alpha map, will represent the Opacity of the texture being set to 0%, while the white is 100%. This, if implemented correctly, will create a reappearing effect. I exported the animation into a PNG sequence to link to the head’s skin texture on Maya.
The only thing I did differently this time around was the addition of nParticles on the edge of the reappearing texture map, which, as I’ve shown in the attached video, will be emitted simultaneously. To accomplish this I made a duplicate animation of my spot-like shapes and tweaked them on AE:

Opacity Map 
Emission Map
The same principle applies here. I attached the animated PNG (right freeze frame) onto the Texture Rate attribute, with the white strokes acting as the visible areas from which particles will be emitted.
The purpose of this simulation is to improve the flow of the overall sequence when the Head is being constructed – they’re meant to fill in the awkward gaps and become a sort of ‘build-up’ element as the skin starts to cover up the blue skeleton-like wireframe system underneath. I made 2 transitions to choose between later.
Laser FX
I attempted to generate laser beams on After Effects in the past using the shape tool and Glow fx, however on top of this taking forever to cache, it gave me mediocre results, so I decided to use Video Co-Pilot’s free ‘Saber’ preset. As shown on 0:21 in the above video, I played with the settings until I was happy with the look, and manually masked this over my composited Head renders and background footage.

I tried to mimic the frames in my storyboard as closely as possible for this shot: I also want to make a quick wireframe flicker on the Head to lay emphasis on the fact that it is a bit holographic.
I still have a few shots to composite these laser beams onto, and I also wanted to make a separate render for the emergence of the Hair sims. These will be for next week as I continue to go through all my VFX sequences on the final Premiere edit:

Dynamic Hair Simulation (Capstone Week 9.1/12 Update)
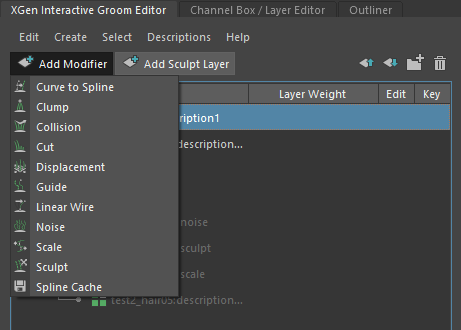
This week I finalised all my moving Head shots for compositing. Looking at my render tests from Week 7, I thought I might be able to allude to hyper-realism a lot better if the hair wasn’t stationary. The beauty with xGen Interactive Groom on Maya is that it comes with many drop-down modifiers, namely Linear Wire which generates hair guides allowing for manual sculpting, as well as dynamic simulations.

I played around with the hair system settings hoping to get a somewhat hyper-realistic result, with every strand reasonably following along according to the head movements.
For my first attempt, I wasn’t sure how to go about the collisions on the face, so I tried using the nCloth Passive Collider tool to create a rigid body that will stop the strands from going through my head mesh. While the viewport showed no errors, my test renders didn’t do it much justice and I ended up with a very jittery outcome. I did a couple other test renders where I re-sculpted the hair, thinking that the issue was caused by the strands being way too close to my mesh to begin with. Nevertheless, they gave me the same unpromising results.

That’s when I decided to scrap the Rigid body and revert to the ‘collision’ modifier under the xGen editor, which I had just discovered. This feature proved to be much more intuitive as it not only allowed me to add my head mesh as a collision object but it also came with ‘collision distance’ and ‘smooth factor’ attributes.
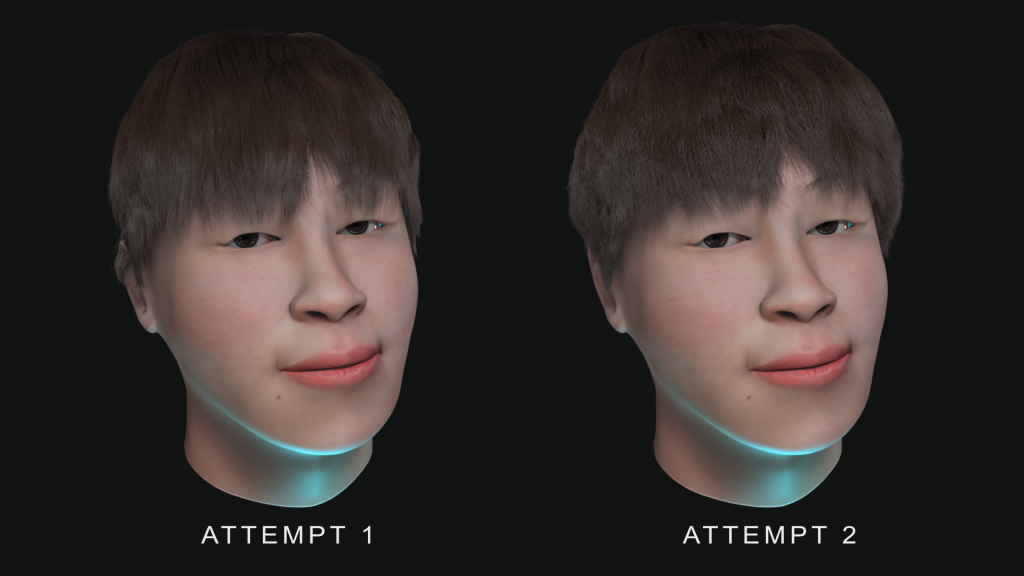
While the outcome is a lot better I was still left with minimal jitter issue around the ears (refer to attempt 1), and so I had to go back and trim some strands surrounding it to make sure it doesn’t go through my mesh prior to the simulation. For good measure I decided I might as well volumise the hair so it doesn’t stick too much to the head (hence attempt 2).
I started rendering the rest of my head shots, applying the same principle.


Next week I will be carrying on with compositing all my shots in After Effects.
Compositing Head Start (Capstone Week 8/12 Update)
During the mid-sem break, I started doing some compositing namely for my hologram device shot, as well as some marker removals via After Effects (as shown in the attached video). The Spring 2019 update incorporated new features called the ‘Track Mask’ and ‘Content-Aware Fill’ which, borrowed from Photoshop, allowed me to efficiently erase some elements from my scene with just a few clicks, as opposed to manually tracking them using Nulls and layering animated solids to cover them up.
Because it sped up my workflow I was able to match-move and 3D track my footage via PFTrack and composite my holo device (rendered from Maya using Redshift) on AE.


I mentioned before that I wanted to go for an Orange and Teal colour correction going into my polishing stage, and I found the perfect LUT / preset for it, hence the breakdown at the start of the video. I will be adding some minor improvements to this shot over time (such as camera lens blurs so that the render does not appear too sharp).
Aside from that I also managed to reshoot my Audience scene- fortunately I was able to get a hold of more actors this time around. The freeze frame below is a very rough masking of all the clips put together just to give myself an idea of the outcome.

Here are screen caps of the individual shots:

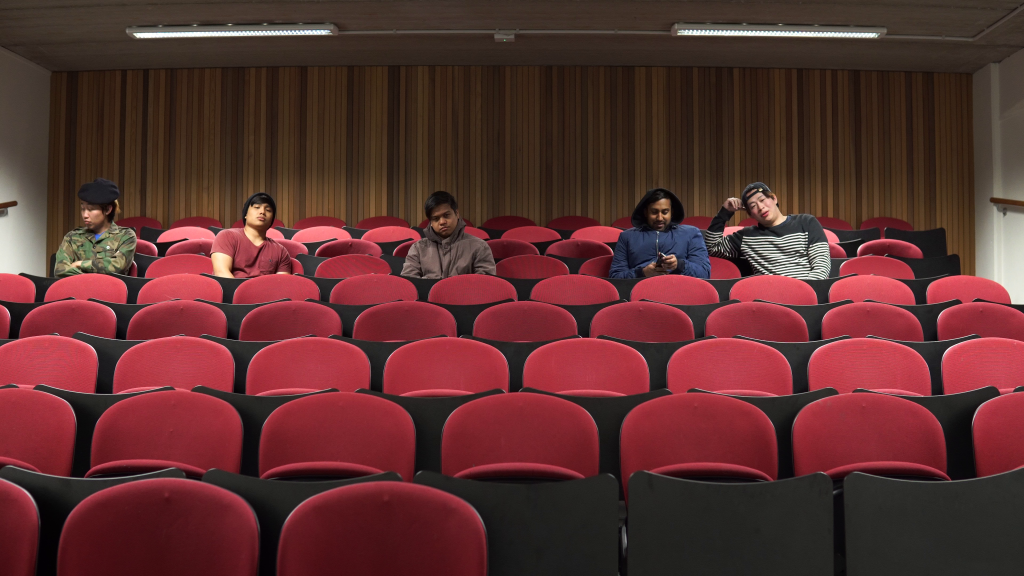

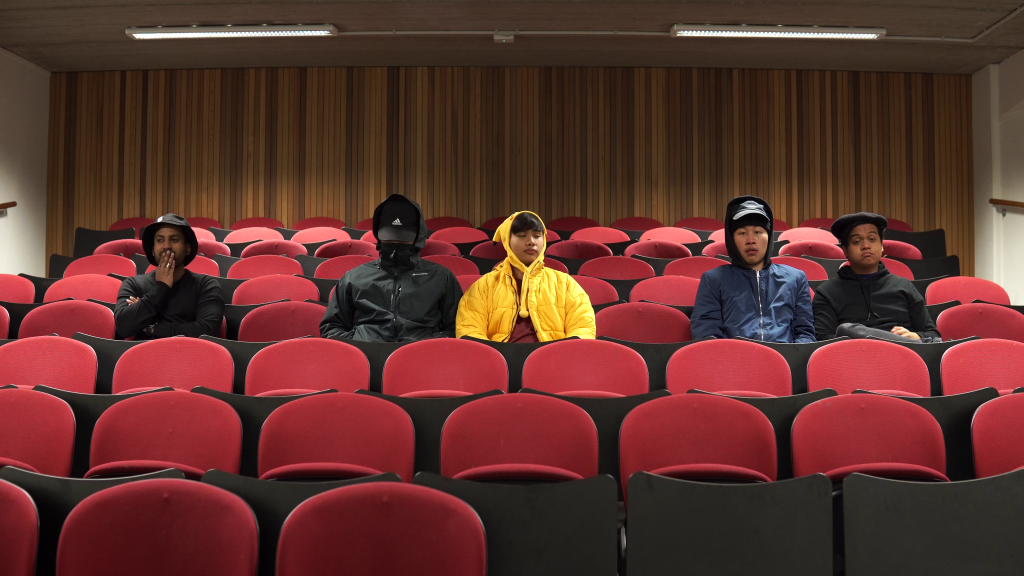

What I learnt as I was going through these is that I could’ve probably avoided some rotoscoping work if I had just recorded my actors in a vertical row instead of horizontal, but then I thought this would also cause problems when they start to clap, so I decided to just keep these and suffer through hours of frame-by-frame rotoscoping (which isn’t ideal, but so far doable). I will just have to find a way to speed things up.
Adding Eyelashes (Capstone Week 7/12 Update)
After gathering some stakeholder feedback this week, I decided to give eyelash addition a go to test out whether it would improve the believability of my rig’s eyelid movements.
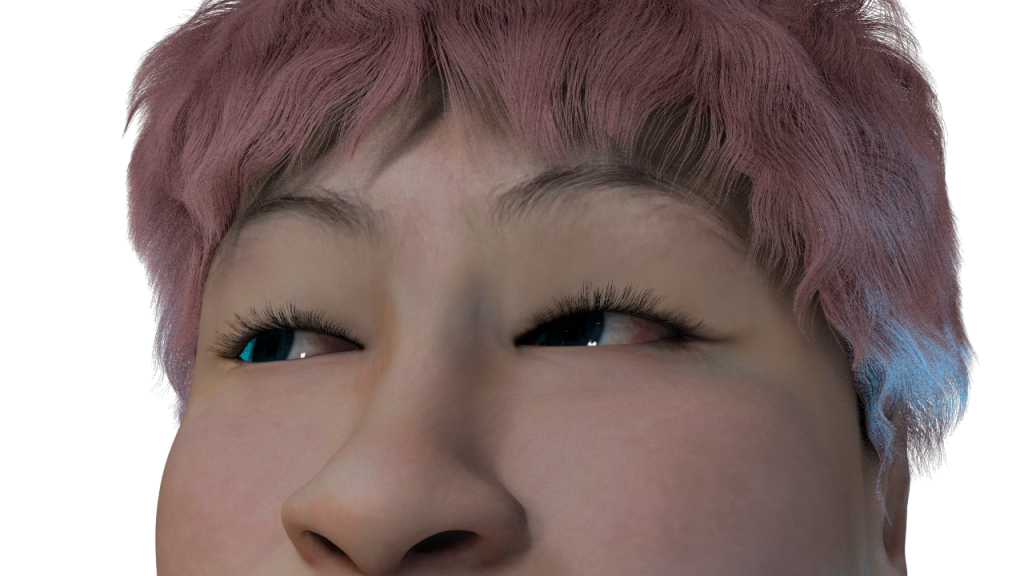

My first attempt was done on the third persona (kpop idol) as it is supposed to possess the flashiest eye makeup. Due to lack of time I didn’t want to go through the trouble of creating eyelash blendshapes and having to reset my rig, which could potentially break my animations – instead I resorted to a very unorthodox method involving the Point on Poly geometry constraint.
Combining a few lashes at a time (instead of the whole thing as one mesh) and constraining these on appropriate faces of the eyelid to follow only its Y attribute, did the trick for me. The only issue I’m facing with this method concerns the head control (when the head is moved, the eyelashes stop following along). This could probably be fixed via a parent constraint to the head joint.

When it came to the rest of the personas, the eyelashes were shorter and less perky – just enough for them to show on the render.
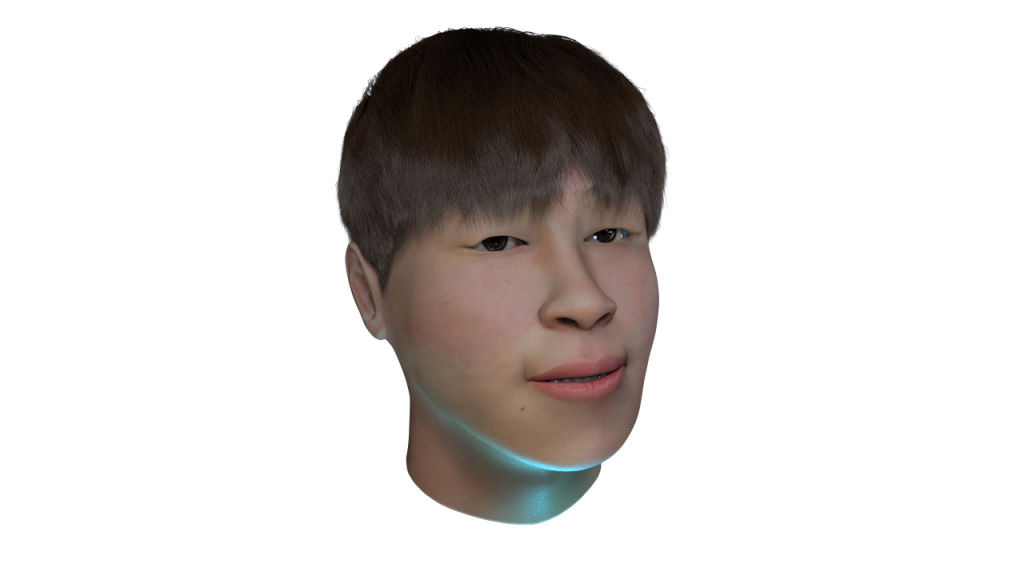
I added HDRI Lighting on the dome light as well as a blue key light for the holo device, where the rig is supposed to be projected from in the scene. The video attached above is the result of my animation render tests. I will be working on improving the seamlessness of the compositing onto my live action shots in the next few weeks.
