Playing with Maya’s Fire Simulation FX

Once I was happy with my model, it was time to incorporate my fire concept. I did some research beforehand and found this YouTube tutorial video specifically helpful as it not only outlines the use of Maya fluids when simulating fire, but also touches on how to control emissions via alpha maps. As opposed to any ordinary simulation affecting the entire geometry, I only wanted certain parts of my character mesh to emit fire. To achieve this, I hopped on Photoshop to create the following textures:

(1) Original Texture, (2) Burnt Texture, (3) Fire Emission map

Going through the tutorial, the alpha channels shown on the 3rd texture are the ones I used to control fire emissions from the mesh (black = no emissions, white = emissions). For the sake of efficiency and to avoid messing up my original character mesh, an Alembic cache is referenced. What this does is it maintains the objects’ hierarchy and saves as essentially a duplicate geometry of my character, in which I can make all of my fluid emissions changes instead.

mocaprender6

I had a little play-around with the settings of the emission, still following the YouTube tutorial, until the result looked the most like fire as shown above. (Rendered with Arnold.)

mocaprender8

Then I hid the alembic cache to reveal my original character geometry, and also began animating the texture, fading (1) to (2), to give off the sense of burning paper. This was achieved via linking Image Sequences of the texture animation (which I exported as .PNG files from After Effects) to the materials.

Despite how good everything started to look, the render time was considerably slower on Arnold due to this effect (it was slow trying to load the simulation in the viewport to begin with), and so I’m considering learning Redshift (a GPU-based renderer) which I heard is supposedly a lot faster than the former. I’ll get back to this blog once I’ve done that.

Lighting Exploration through my VFX Assignment

This is an 80s inspired MTV Ident I made for my Studio III paper. I happened to incorporate the model I initially intended to use solely for my minor as one of the many retro elements I’ve put together for this assignment, and I thought it worked seamlessly.

Due to this prototype testing and the experiments I made with regards to neon lighting, the exploration helped me decide on the mood for my MoCap sequence. I now intend to do the polar opposite of what this video portrays as a way to bring contrasting ideas to life; meaning while this ident is light-hearted and well-lit, my Origami short will feel more melancholic in essence.

Origami Mesh Progression

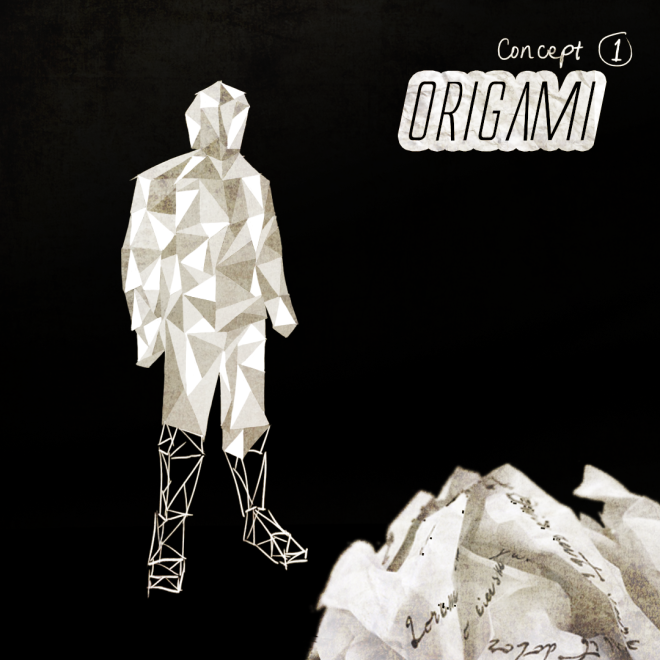
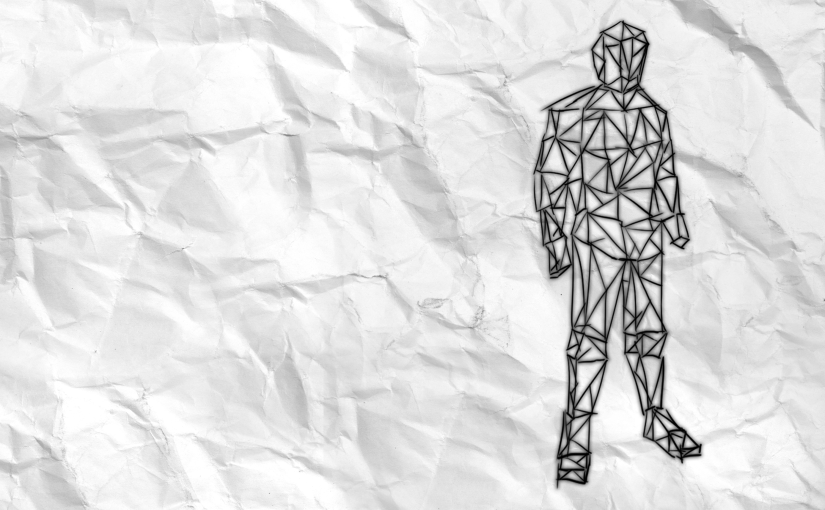
After much consideration, I decided to just craft a mesh that entirely mimics the look of an Origami as opposed to my initial idea of combining a wireframe / toon outlines look with it, as this will prove distracting and inconsistent with the mood I wanted to go for: that being a melancholic sequence that becomes a visual metaphor for ‘love and death’ (mainly the death aspect). As I go through with the 3D model, I will be integrating screenshots to my process for more clarity.

forwordpress1

The early process involved importing reference images as planes onto the Orthographic front and side views of the Maya viewport, solely for modelling guidelines. I then began to mold the character from a primitive cube, adding new edge loops and adjusting the vertices to follow the shape of the reference image accordingly.

forwordpress2forwordpress3

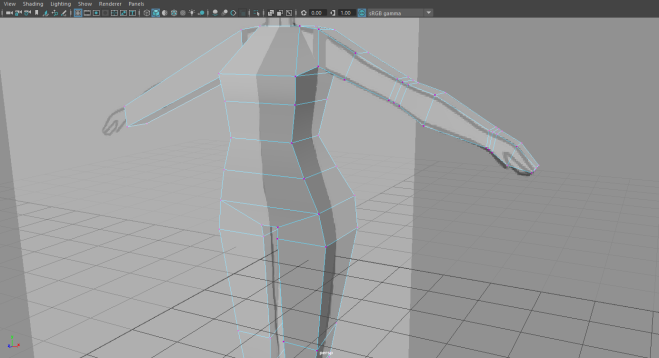
I began by first shaping the torso before making my way out to the arms and legs (extruded from the top and bottom sides). An efficient method in ensuring the mesh is symmetrical, (saving me the efforts of having to work on one side of the body at a time) is Maya’s Duplicate Special, a feature that essentially mirrors half of your mesh with instant feedbacks.

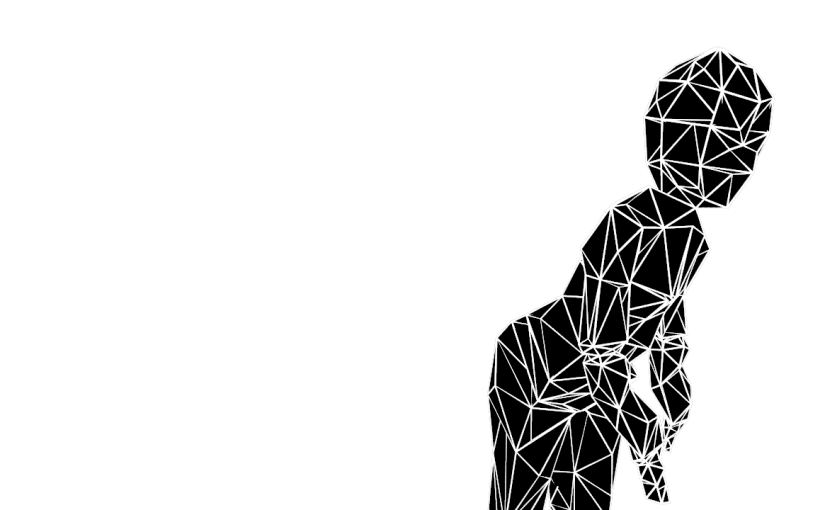
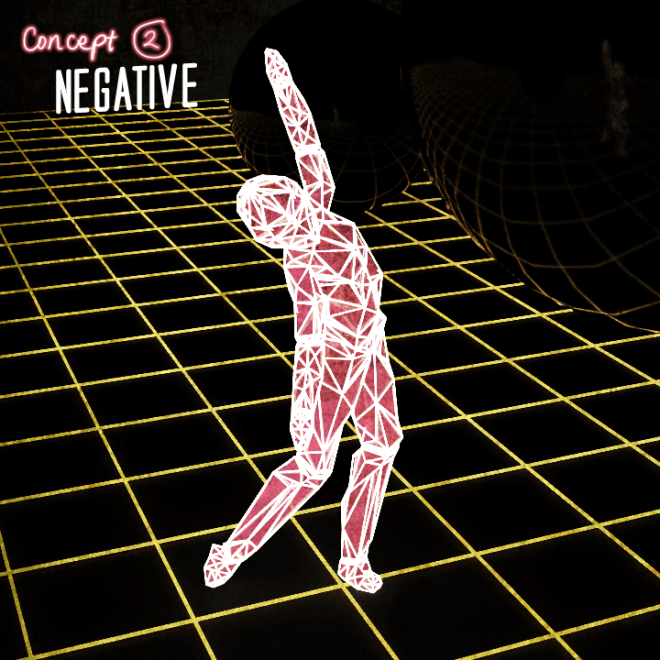
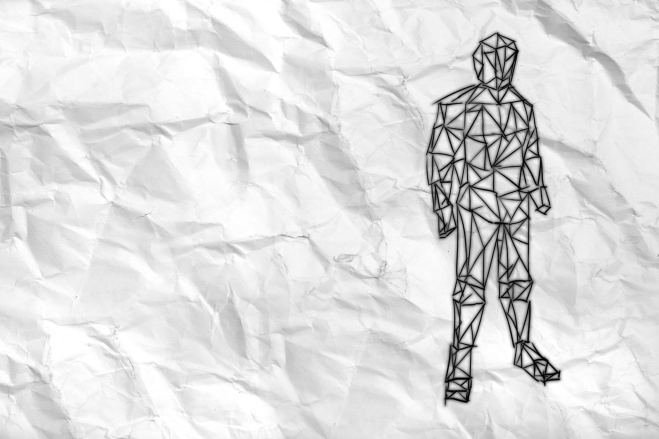
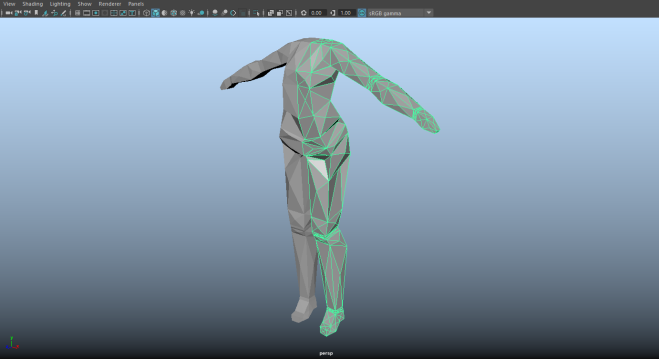
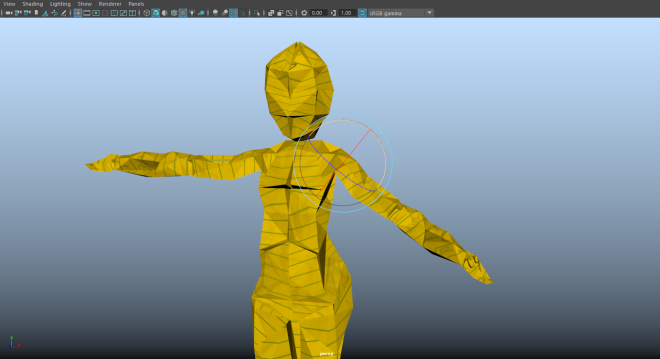
By the time the model started to look more like a body, I wanted to give my character a more polygonal look to create the folds in the paper, so what I did was subdivided the faces of the mesh into triangles (as shown in the screenshot above). With these new vertices I am able to shape the model in a way that makes it look a lot less blocky.

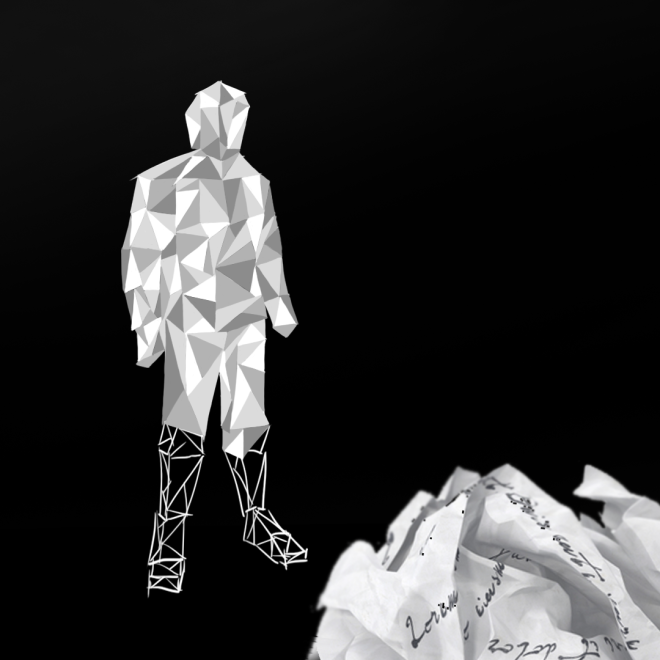
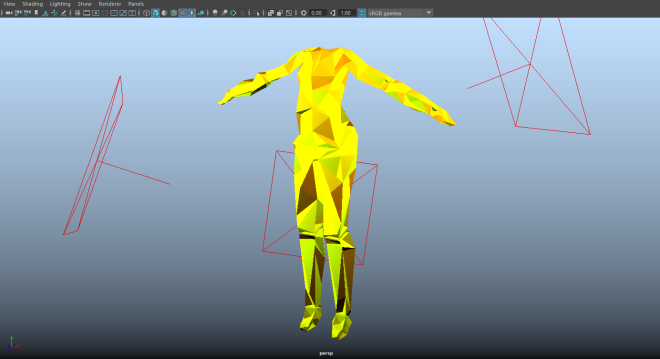
I also added lights in the scene so I could tell which areas needed more emphasis. This is the result:

forwordpress4forwordpress5

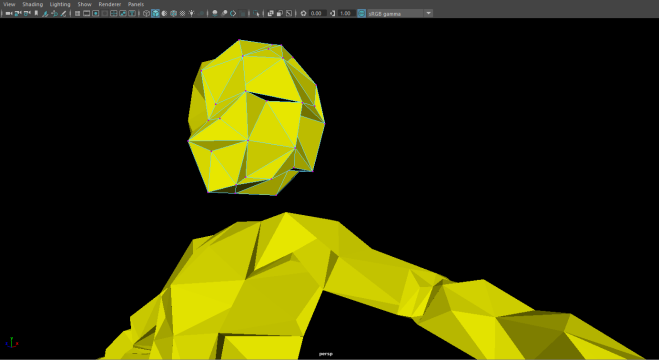
The same process is applied to the head. As opposed to the cube, I used a primitive sphere to make the shaping a little easier. I connected the head to the body once I was happy with the outcome, deleted the Duplicate Special and mirrored the 1/2 before combining them into one whole mesh.

forwordpress6

The next step was rigging a skeleton for the model, followed by Weight Painting or assigning which parts of the mesh goes with which joint in the skeleton. At first I went through a similar process as my 3D game character last year – a brief overview of that can be found in this post. While this rigging method worked for a moment, further testing later had me struggling to create a fully functional control rig that is compatible with my capture data (as well as the MotionBuilder actor I would later use to retarget it with). Somehow the effectors I’ve assigned on the joints weren’t doing their job. With little patience to figure out how let alone what to fix, I ended up using the Auto-Rig feature on Maya instead, which I found to be relatively more efficient and just as customiseable as the rig I made previously.

Auto-Rig gave me the option of manually setting up the guides in positioning the joints. They were also properly labelled, making it easier to tell where to place them in my character’s anatomy. As soon as I finished this step, the control rig (with detailed control references visible in the outliner) was made in just one click. The Weight Painting was close to perfect, I had to readjust a few minor deformation errors, but I did find this to be more effortless compared to when I made the rig from scratch.

forwordpress7

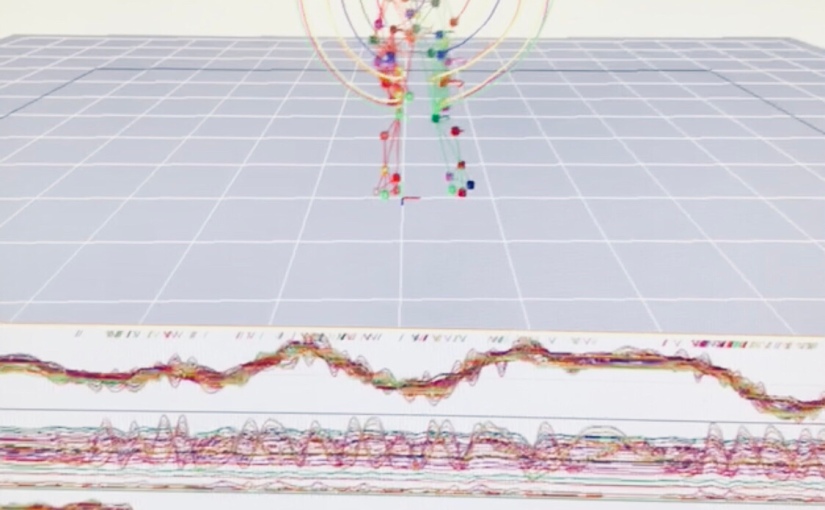
After this, I was finally able to test this new rig out on my capture data in MotionBuilder without experiencing further issues, which was a huge sigh of relief.

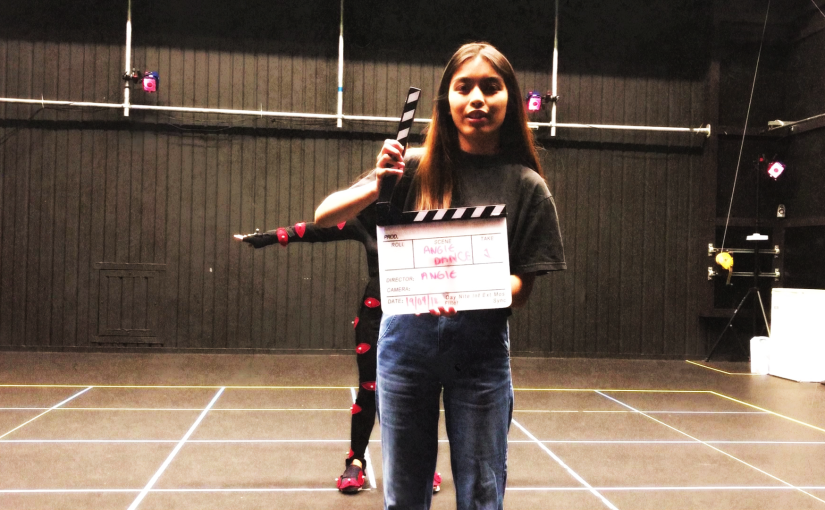
I then followed the Motion Capture Pipeline tutorials provided to the class, to retarget my data until it’s moving well with the mesh, later baking it and adding extra animation layers to manually refine the movement, especially in areas not affected by MoCap such as that of the foot and the wrist. I used the video we recorded at our session as reference for this task. (see Capture session post)

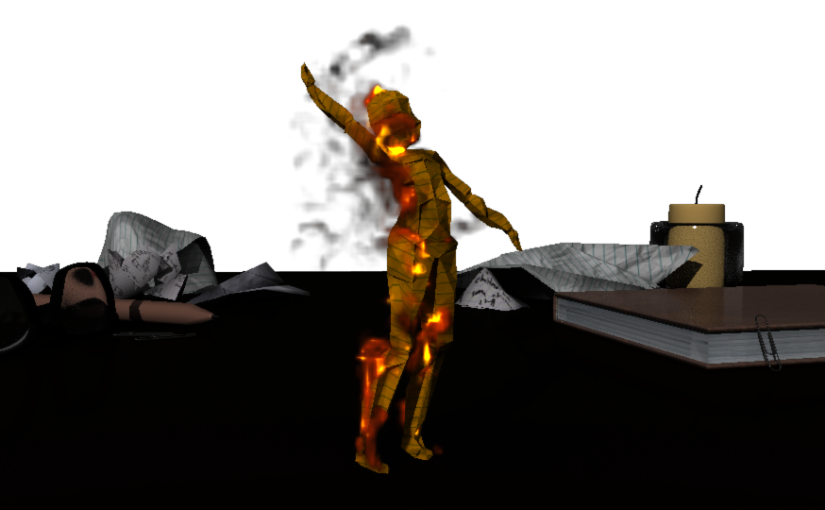
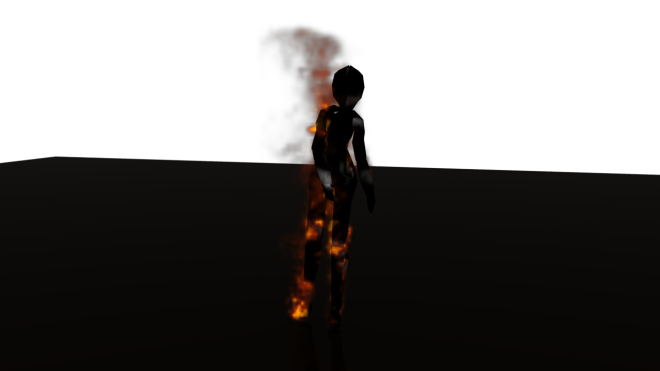
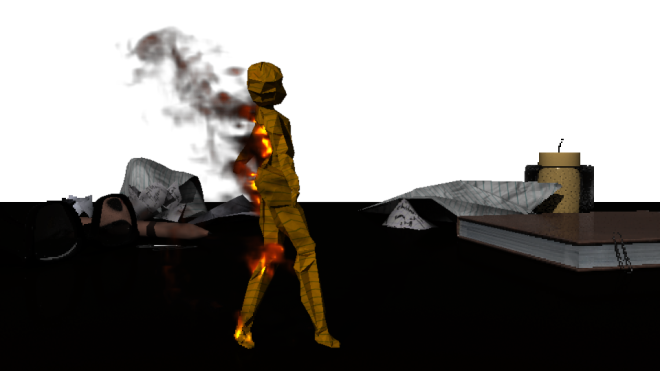
Since I’ll be adding more FX, I fixed the textures and UVs last without baking them into the mesh just to keep my options wide in terms of the final look:

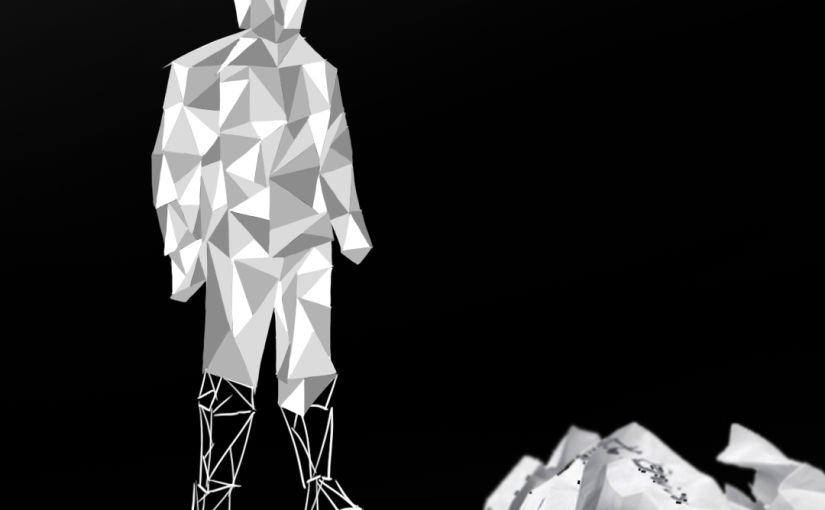
Final Character mesh

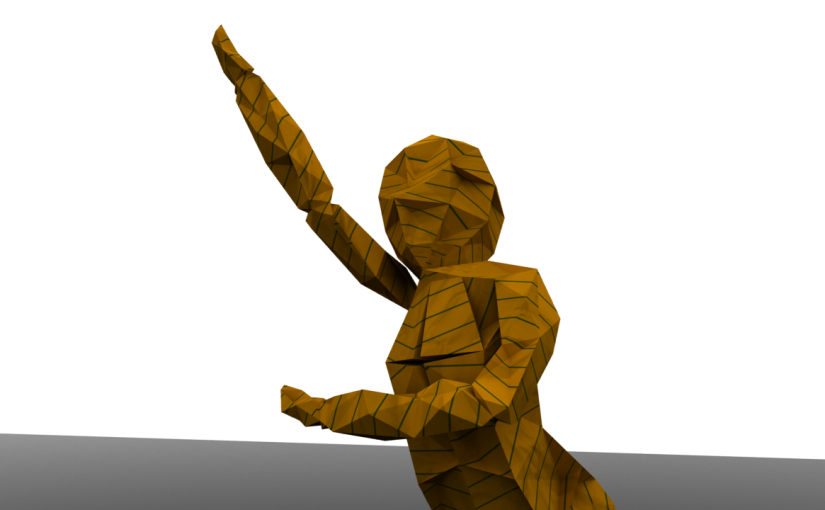
Textured look (Arnold Render)

The reason for the yellow pad-paper texture (made in Photoshop) was not only to mimic the look of an origami but also to emphasise the paper folds through the refill lines; I found it hard to make them noticeable with just a plain colour. For the extra detail I also added the following scribbles:

mocapCUfire.0106

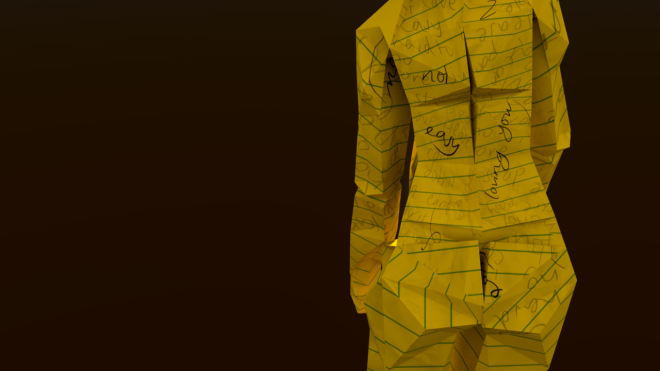
The words “loving you, not easy” echoes the lyrics of the song I intend to use in the sequence. (The free track, Reaching the Summit VIP Remix – Andy Leech & Justin Jet Zorbas, with permission to use and modify for educational purposes)

Ambience composition

mocaprender3mocaprender5

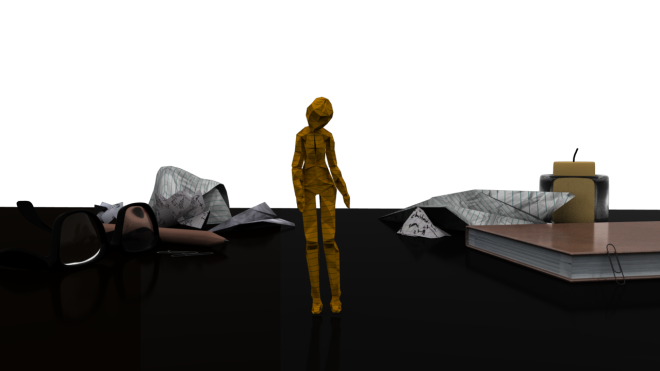
Other than filling up the empty backdrop of my scene to make it aesthetically pleasing, I wanted to give a sense of familiarity in the environment, having it resemble a student’s desk, but not so much to a point where the focus is taken away from the Origami character. (Note: assets in the back are free and downloaded from TurboSquid.)

Data Clean-up in Cortex

I was most confident about this bit of the MoCap process, because based on the data we acquired last year, it was relatively a quick and easy one. However I seem to have run into more issues with marker switches this year that were harder to spot, which slowed things down for me.

The first factor was that Cortex Suites were very high in demand. Perhaps I underestimated how time consuming it was going to be as I only booked the room for 2 hours. It turns out I needed more than that which led me to booking for another day with a longer session. Thankfully, I was able to spot the initially unnoticeable glitches in the data I thought was cleaned up before I called it a day.

The issue was that I focused more on closing the gaps in the data (usually caused by the marker switches) and assuming they were ‘fixed’ before actually checking whether the closure fit the rest of the motion. Sometimes the cubic joint / virtual joint tools leave jagged lines, causing the marker to fly off and thus disrupt the motion flow. And so what I did was I restarted the process and became much more careful (instead of closing the gaps with one click, I went through them frame by frame to ensure no jagged lines were created.)

Here is a video of the cleaned up data, without glitches. (The motion flows are noticeably smoother and curved, and I was good to go.)

Conceptual Art Developments and Alternatives

Part of my design process involves crafting different ideations and alternatives on Photoshop for a clearer visualisation of the final project, and the further exploration on the mood of the sequence that I’ll eventually go for. Images below are my final four conceptual art.

mocapconcept1

As mentioned in my previous post, this is a quick 2D sketch I made and it will serve as a guide to the later modelling of my Origami character concept in 3D.

mocapconcept2

For the sake of exploration and quick experiments on geometry, I made a version of my initial Origami mesh with toon outlines I generated on Maya, which is then rendered to resemble neon lights, further accentuating the wireframe look. (I used this concept for my MTV Ident Assignment, here is the link to that video.)

mocapconcept3mocapconcept4

Both these concepts are what I’m considering to develop towards my final project, I am thinking on making perhaps a combination of the two, such as that of the use of ash to transition between the fire and the disappearance (death) of the character.

Capturing Data (DIGD605 MoCap II)

The class decided to capture data in groups for a more efficient workflow. My group (consisting of Emiri, Alan and Angie) was fortunate enough to get a hold of a dancer (my friend from high school, Julia Jovanovic), to be our mocap performer. After much planning, we booked Thursday, 19th of April for our mocap session. This year’s project is more individual therefore each member of the group has to direct / choreograph the performer. My group came unprepared on that regard, and attempted to improvise the movements on the day of the session, which was a thrilling experience. Our time constraint was about 3 hours, which was enough to go through everyone’s concepts, and we didn’t rush.

Before the session, I put together a remix of the song I wanted to use for my sequence, and I brought it there to play in the background. It was a plus directing Julia, as she seemed to do well improvising choreography by hearing just the music.

To be safe and expand my options, we did 2 takes of the dance. I also made it a priority to  organise the reference videos we took, and ensure we were working on duplicates of our original data (which is saved in my hard drive), just so there are increments and backup available to prevent us from losing potentially crucial files in the event that restarting clean-up happens.

Overall I found the session to be comparatively chill and quicker than last year’s, because we didn’t have a lot of footage to shoot and it was really more to do with widening our choices by doing heaps of variations of the dances since we individually had creative control over our own respective projects.

MoCap II Project: Brainstorming

Semester 1, 2018’s Motion Capture II Assignment, in contrast to last year’s narrative-based brief, gives us the creative control to take on a more experimental approach to a body in motion. This can be achieved by exploring alternative visualisations of performances that feature body movement, such as that of dance, sport, combat, mime and the like – as well as the use of geometric shapes, particle effects, fire, smoke effects, and dynamic simulations.

Project
An open brief to create a 30-second non-figurative / abstract motion capture sequence.

Mood Board

One thing that stands out to me for inspiration is 2D art. I wanted to capture the essence of stop motion animation in my sequence; that’s how I first came up with the idea of a 3D character of 2D origin (such as paper). In addition to this, I decided on making it revolve around the abstract notions of love and death. My main focus will be a dancing character resembling an Origami, which at some point in the sequence will set itself on fire. The purpose of the fire, other than being the metaphor for ‘death’, is to act as a visual accentuation of the character’s movements.

4mocapblogmocapconcept1

With regards to the style, I wanted to go for a paper look. It will be modelled in low-poly and textured accordingly to retain its 2D appearance. I may consider leaving the bottom part of the mesh with a wireframe look to go for a more abstract outcome, but might just scratch off the idea and make it a character that entirely resembles Origami.

Post-Production Highlights (MoCap)

This year’s MoCap study has been both an informative and stressful ride, and I will aim to all the techniques I’ve learnt and issues I’ve dealt with upon completion of the last few bits of the assessment in this entry.

Watch a montage of my pre-vis reference videos here

Data Clean-up. I found the clean-up process on Cortex to be the most time-consuming even after splitting the data between us in an attempt to be efficient. We may have been able to avoid some issues such as marker switches, but sometimes miss minor errors until after exporting, most of which were due to using Cubic join too much and unintentionally having markers fly off, causing us to restart the process. Fortunately, we were advised to work on duplicates of our original data, just so there are increments and backup available to prevent us from losing any more time and potentially crucial files. As soon as we finished clean-up I compiled our new data into a folder for everyone in the group, and from then on it was an individual project.

Motion Builder-Maya Pipeline. Throughout this year in my Digital Design course I’ve had a lot of experiences with 3D from previous projects (namely character modelling, rigging and animation). With that said, I didn’t have too much trouble with the supposed complexity of the technical work in the pre-vis so I was able to go through the tutorials and adapt to the techniques quite quickly. I’m not so familiar with Motion Builder, so after I finished adding extra hand animations, I worked on trimming in Maya via the Time Editor, surprisingly a feature I’d never used before, just so I have all my assets perfectly in sync in the farm scene. I wanted to be able to edit my character animations in Maya as I would in a video-editing program and the Time Editor allowed me to do this, but of course this discovery didn’t come without complicated issues, which taught me to be flexible and work around the problem. Regardless, I did enjoy the process in Motion Builder and found this assignment to be a helpful introduction.

Playblasts. I submitted my pre-vis draft for the formative on the 25th of September, and got my lecturer’s feedback. The only problem he had with it other than the absence of a crowd and a police rifle which I was meant to add in later on, was some close-up shots not having enough head room for my character. He also wanted me to do change my low-angle establishing shot at the start of the scene to something a bit more eloquent, which I did along with other improvements like the addition of audio and laser beams for my summative.